

-
Start Zentu Genesis
-
Connect with MetaMask
-
Provide Your Signature
-
Connect and Continue
-
Get Your ZENT
-
Agree and Poceed
-
Finalizing Your Transaction
-
Prove You’re Not A Robot
-
Accurate Memo and Master Wallet Address
-
Accurate TXID
-
Rejected Transaction
-
Confirmed Transaction
-
Details of Your Transaction
-
Track Your ZENT
-
Claim Your ZENT
-
Confirm Your Claim
-
Claimed Successfully
-
Track Your Reward
-
Claim History
USER MANUAL
Zentu Genesis is designed to facilitate the seamless exchange of ABBC for ZENT at a pre-determined ratio. This user manual provides detailed instructions on how to navigate the Zentu Genesis platform and complete the transaction process.
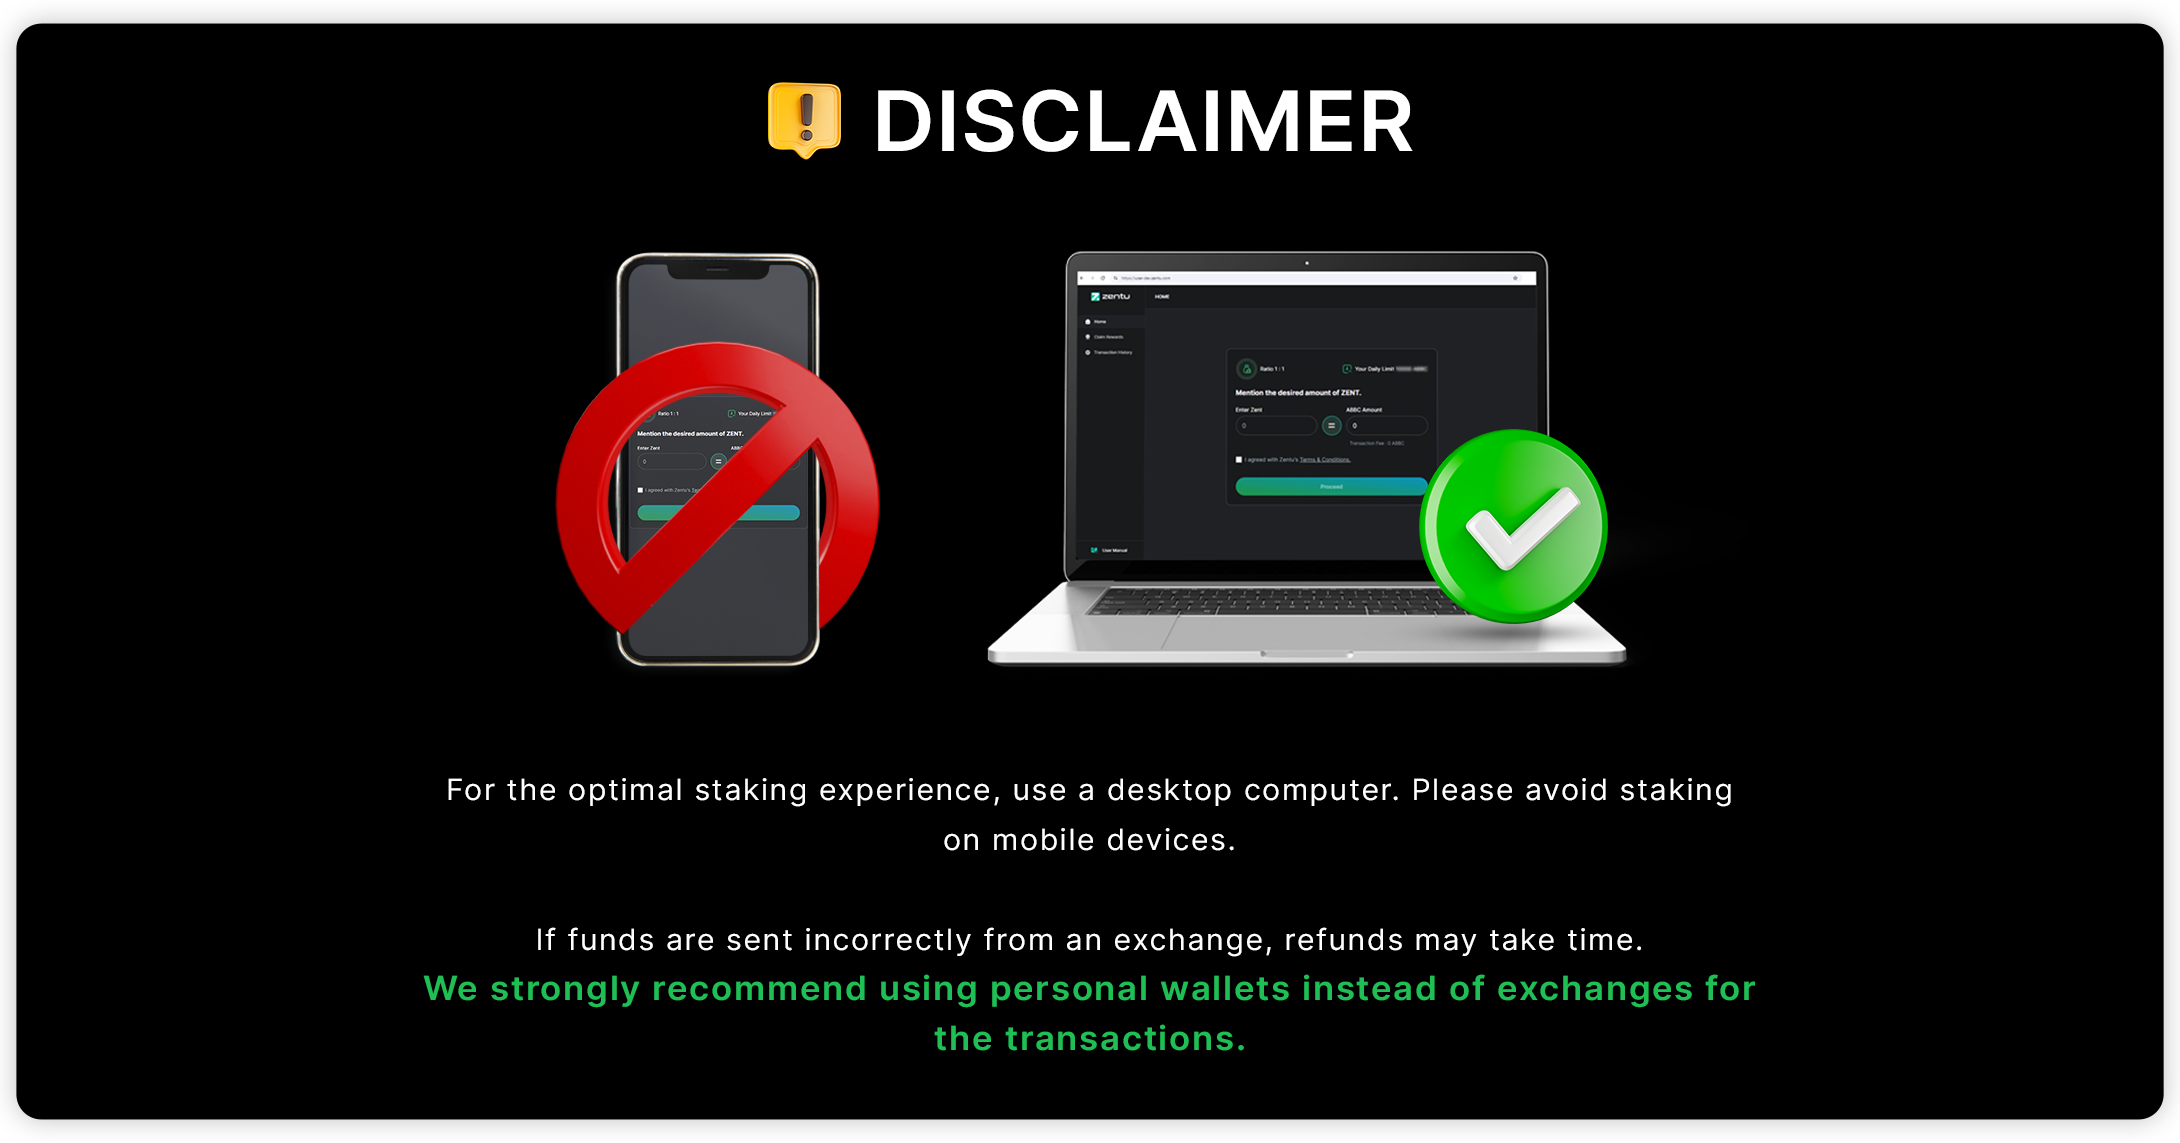
- For the best experience, we recommend using a desktop computer; please refrain from using mobile devices.
Start Zentu Genesis

Start your Zentu Genesis Phase to receive ZENT in exchange for your ABBC.
Note: Kindly check the Total User Daily Limit and Total Burns before proceeding with the transaction.
Connect with MetaMask

Click "Sign In" and follow the prompts to connect your MetaMask wallet
Provide Your Signature

Sign in to your MetaMask wallet and provide your signature to authorize the ZENT reception.
Connect and Continue

Now that you have connected to the MetaMask wallet, continue with the network genesis allocation process by clicking on “Next.”
Get Your ZENT

Enter the desired ZENT amount you want in exchange for your ABBC.
Note: Ensure the correct ABBC amount for exchange.
Agree and Proceed

Check the box to confirm your agreement with all Zentu Terms and Conditions and click on “Proceed” to go to the next step.
Note: A transaction fee will be applied to your transaction of ABBC to ZENT
Finalize Your Transaction

Kindly enter the exact Master Wallet Address and unique.
Once you have transferred the ABBC, please provide your transaction ID (TXID) in the designated space by pasting the TXID from the explorer.
To verify your non-robot status, please enter the CAPTCHA in the designated space.
Prove You’re Not A Robot

After you have entered the TXID and checked on the non-robot status, click the "Submit" Button to continue with the transaction.
Reminder: Complete the process within a 5-minute window. The page will expire after 5 minutes.
Accurate Memo and Master Wallet Address

Enter the correct ABBC amount and accurate Memo. Transactions won't process if there are inaccuracies.
Accurate TXID

To facilitate smooth transaction processing, please enter the TXID accurately. An invalid or incorrect TXID may hinder the processing of your transaction.
Rejected Transaction

If the transaction is rejected despite entering all details correctly, do not hesitate to contact Zentu customer support at [email protected]
Confirmed Transaction

You have completed the transaction successfully.
Now, you can get your share of ZENT daily for a total of a 3-year vesting period, starting after 24 hours from the time of this transaction.
Note: In the event of a failed transaction, please double-check the details and restart the process.
Details of Your Transaction

View your transaction details through the provided dashboard. To access the dashboard, you can go to the “Transaction History” section.
Track Your ZENT

Track your total claimable ZENT accumulation in this dashboard. To access the dashboard, you can go to the “Claim” section.
To claim your ZENT, click the "Claim" button located at the top right corner of the screen.
Claim Your ZENT

Upon clicking "Claim," you will see the ZENT amount you're entitled to receive in your MetaMask wallet. To proceed, simply click "Claim."
Note: You will be charged a nominal ETH gas fee for your claim.
Confirm Your Claim

Confirm the transaction on MetaMask to claim your accumulated ZENT.
Note: Ensure your MetaMask wallet has sufficient ETH balance to cover the gas fee for the transaction.
Claimed Successfully

Upon successful confirmation, your desired ZENT amount will be claimed.
Note: After the admin validates your claim, you will receive your accumulated ZENT in your MetaMask wallet. Ensure proper payment of the gas fee to prevent claim rejection by the admin.
Track Your Reward

Go to the “Claim Rewards” section, to track if your claim is pending, approved, or rejected.
Claim History
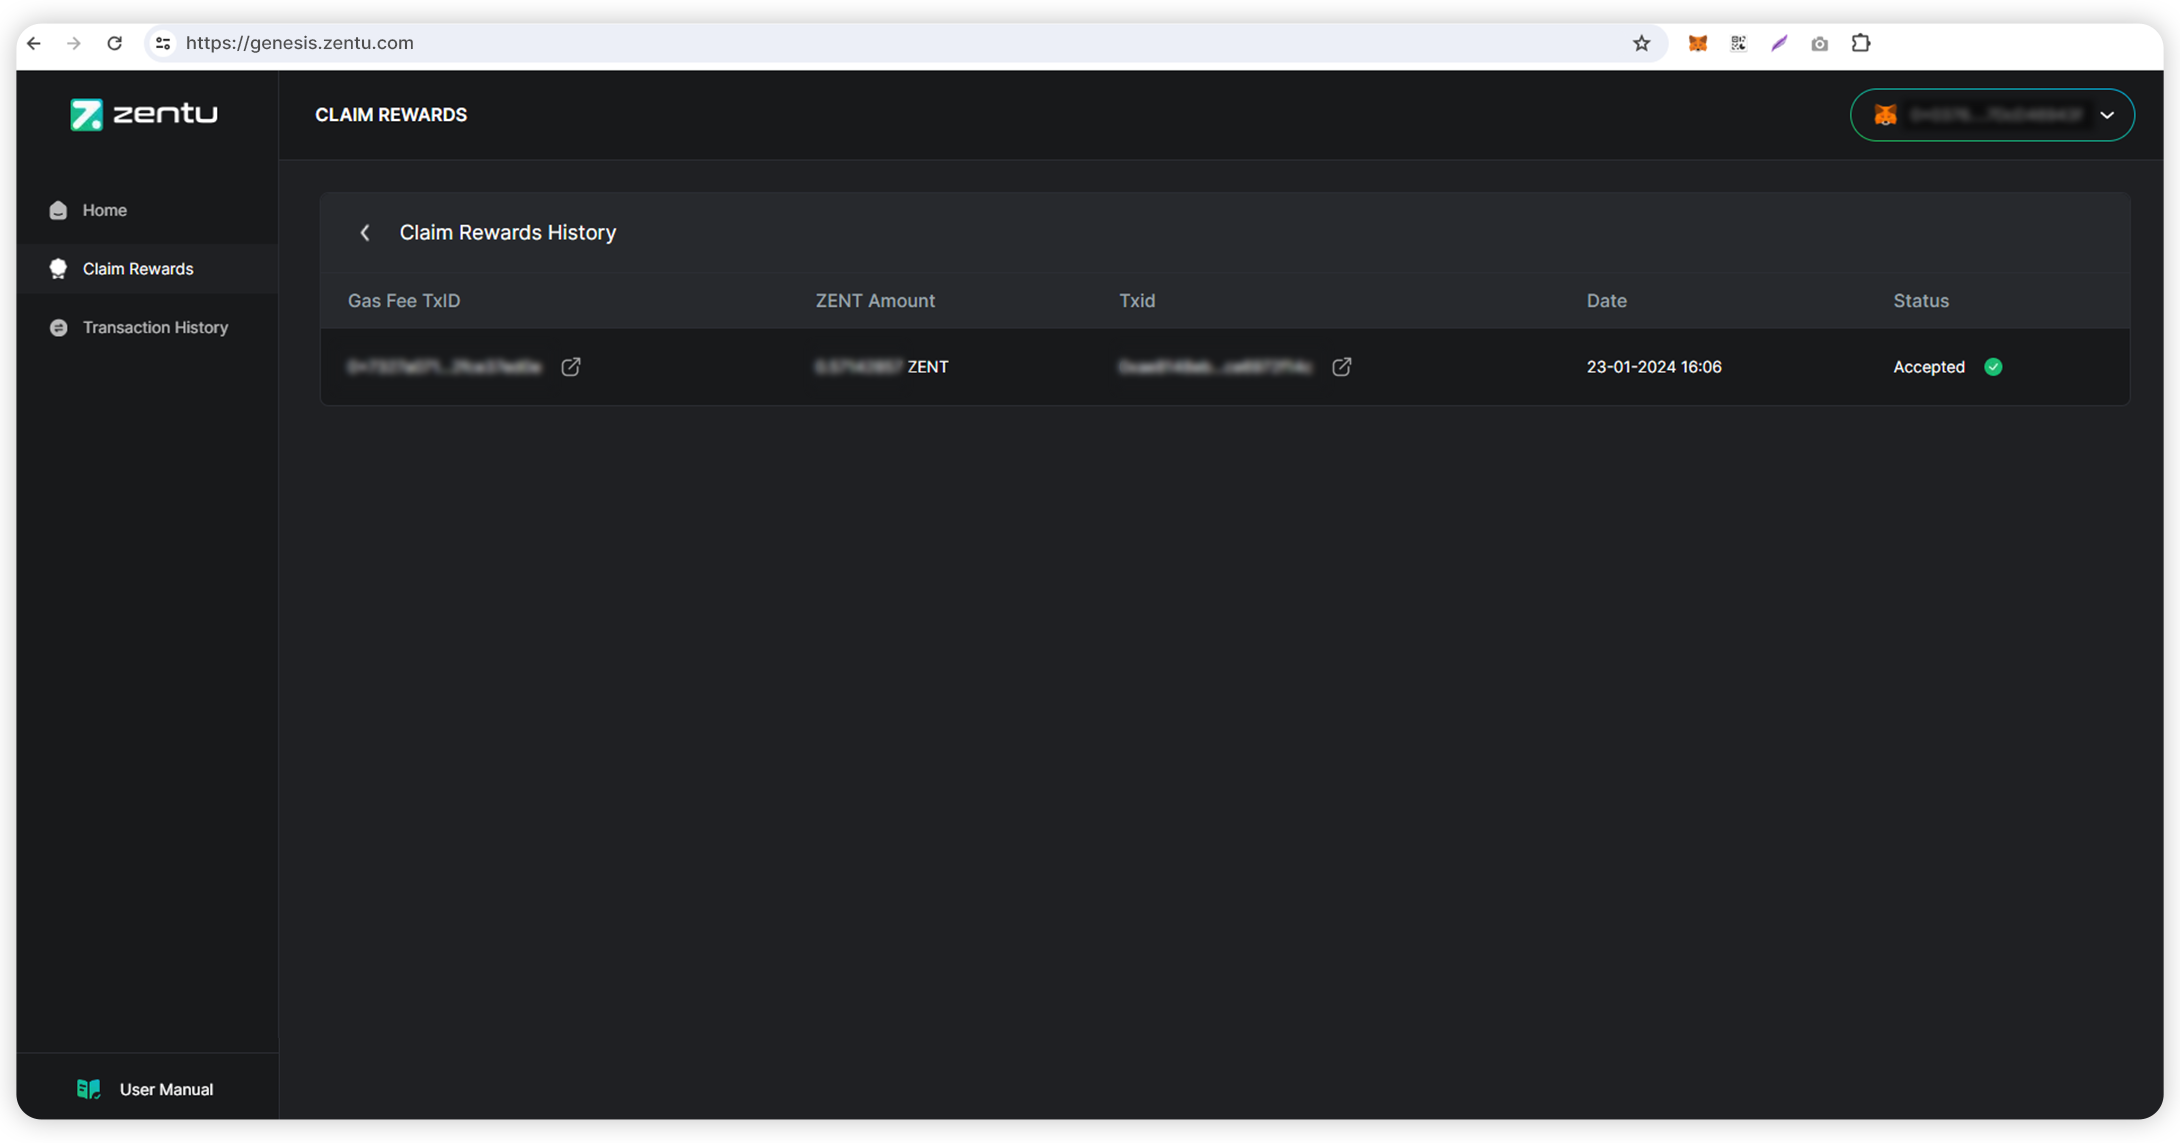
After your claim is either accepted or rejected, you can locate it in the "Claim Rewards History." In the case of rejection, hover over the "Rejected" sign to view the reasons for the rejection.